Physical Address
304 North Cardinal St.
Dorchester Center, MA 02124
Physical Address
304 North Cardinal St.
Dorchester Center, MA 02124

Uncover why this demanding 6-kilometer New Zealand trek defeats many hikers despite costing just $25 in gas to reach.
When Sarah from Auckland completed Avalanche Peak last spring, she spent just $25 on gas to reach Arthur’s Pass Village—proving you don’t need deep pockets for New Zealand’s most rewarding day hike. You’ll face 1,100 meters of vertical gain over 6 kilometers, but the technical challenges and gear decisions you make before stepping onto that first scree slope will determine whether you’re celebrating at the summit or turning back disappointed.

Since Arthur’s Pass National Park sits roughly halfway between Christchurch and the West Coast, you’ll find it surprisingly accessible whether you’re driving or taking public transport.
The drive from Christchurch takes about 90 minutes via State Highway 73—it’s scenic but watch for frost in winter months.
If you’re budget-conscious, TranzAlpine train service runs daily between Christchurch and Greymouth, stopping at Arthur’s Pass village. Book ahead for better prices, especially during peak summer season.
The Avalanche Peak trailhead starts right from Arthur’s Pass village, making logistics simple. You’ll find parking near the visitor center, though spaces fill quickly on weekends.
Grab trail maps and weather updates from the DOC office before heading out—conditions change rapidly in alpine environments.
Winter trekkers should pack specialized camping gear to handle the harsh alpine conditions and potential overnight stays in the backcountry.
Once you leave the village, the trail immediately demands respect as it climbs steeply through beech forest for the first hour. You’ll gain significant elevation quickly, so pace yourself and bring plenty of water.
The route follows orange markers, but they’re spaced widely apart. Don’t rely solely on them for navigation—download offline maps on your phone as backup. Weather changes rapidly here, and visibility can drop to meters within minutes.
Key navigation points to watch for:
You’ll cover roughly 6km roundtrip with 1,100m elevation gain. If winter conditions are present during your trek, ensure you have essential snowboard gear for safe navigation across snow-covered terrain sections.
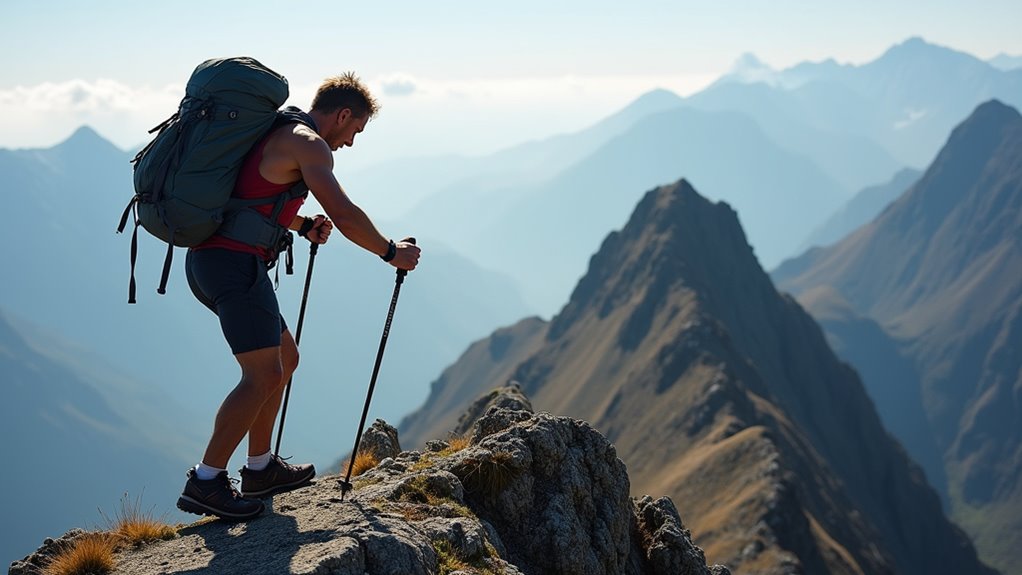
While the distance might seem manageable at just 6km, don’t let that fool you—this trek will push your limits with its relentless 1,100m climb packed into a short route. You’ll need solid cardiovascular fitness and strong legs for the steep, rocky scrambles.
The final section demands basic rock-climbing skills as you navigate loose scree and exposed ridges.
Start training at least six weeks beforehand with hill walks carrying a daypack. Include squats and lunges to strengthen your quads—you’ll thank yourself later. Don’t attempt this trek if you’re afraid of heights or lack hiking experience on challenging terrain.
Budget-wise, proper hiking boots are non-negotiable here. Rental gear from Christchurch costs around $30 daily, but investing in quality footwear prevents costly rescue situations. Consider staying at youth hostels in nearby Arthur’s Pass or Christchurch to keep accommodation costs low while you tackle this challenging adventure.
Because weather on Avalanche Peak changes faster than you can say “hypothermia,” you’ll need layered clothing that adapts to everything from blazing sun to sudden snowstorms. Don’t break the bank buying fancy gear – smart budget choices work perfectly.
Your essential kit includes:
Check the weather forecast obsessively, but pack for conditions worse than predicted. Mountain weather lies. If you’re planning to extend your outdoor adventures beyond just day hiking, consider exploring family camping activities that can help build outdoor skills and confidence for the whole group.

The 360-degree panorama from Avalanche Peak’s summit will make you forget every dollar you spent getting there. You’ll spot Lake Wanaka stretching endlessly below, Mount Aspiring’s pyramid peak piercing the sky, and the Southern Alps rolling toward the horizon like frozen waves.
Don’t blow your budget on expensive camera gear—your smartphone captures stunning shots here. The key’s timing your ascent for golden hour lighting. Start early to catch sunrise, or time your summit arrival two hours before sunset. Pack extra batteries since cold drains them fast.
Position yourself on the summit’s eastern edge for the best Lake Wanaka shots. The rocky cairn makes an excellent foreground element. Remember, you’ll want both wide landscape shots and detailed mountain portraits—the views change dramatically as you rotate around the peak. When setting up camp for sunrise photography, practice low impact camping principles by using established sites and avoiding damage to fragile alpine vegetation.
Getting those perfect summit shots means nothing if you’re not prepared for Avalanche Peak’s serious risks. This isn’t your average day hike – weather changes rapidly, and rescue isn’t guaranteed.
Essential safety prep won’t break your budget:
If you’re planning to tackle this trek during winter months, make sure you have the proper winter camping gear to handle freezing temperatures and potential overnight situations.
Start early to avoid afternoon weather deterioration. If conditions look sketchy, turn back – the mountain will still be there tomorrow.
You’ll find Avalanche Peak isn’t just another hike—it’s like unwrapping nature’s most expensive gift for free. Last year, over 15,000 trampers discovered what locals know: this challenging climb delivers million-dollar views without the helicopter price tag. Sure, you’ll work for those summit panoramas, but when you’re standing above the clouds with the Southern Alps stretched endlessly before you, you’ll realize some of life’s best experiences can’t be bought—only earned through sweat and determination.