Physical Address
304 North Cardinal St.
Dorchester Center, MA 02124
Physical Address
304 North Cardinal St.
Dorchester Center, MA 02124
Nobody believes this backwards fire technique works until they see it burn unattended for hours—here's the secret method.
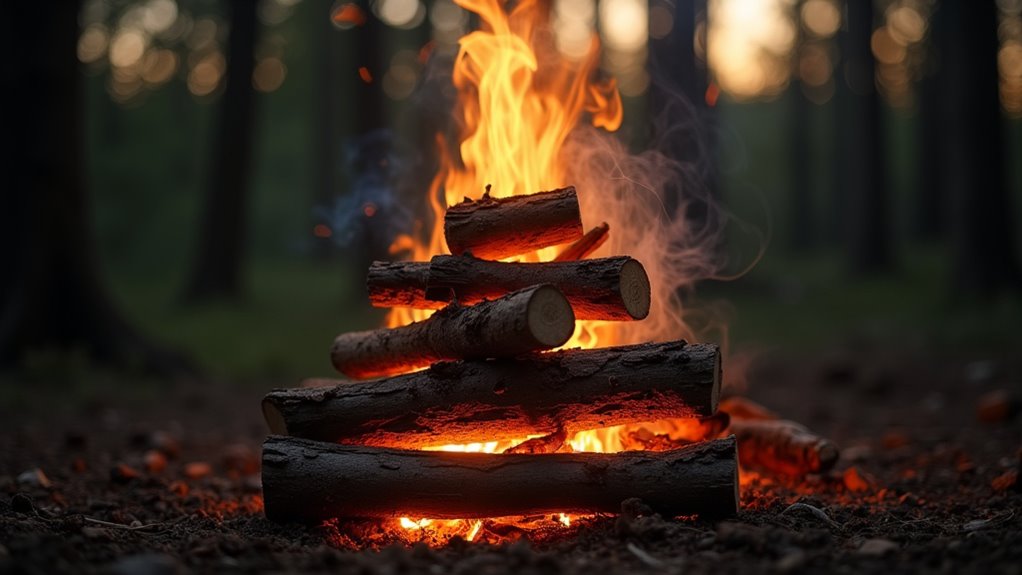
Did you know that a properly built upside down fire can burn for up to six hours without any maintenance? This counterintuitive method flips traditional fire-building on its head, literally. Instead of placing kindling at the bottom, you’ll stack your largest logs there and work your way up to tinder at the top. It’s a game-changer for campers and homeowners alike, but there’s a specific technique that separates success from smoky failure.
When you’re tired of constantly feeding logs to keep your campfire alive, the upside down fire method flips traditional fire-building on its head—literally. Instead of starting with tinder at the bottom, you’ll stack your largest logs first, then layer progressively smaller wood on top, finishing with kindling and tinder at the very peak.
This technique works because fire naturally burns upward, allowing each layer to ignite the one below as it burns down. You’ll create longer-lasting fires that require minimal maintenance—perfect for cold nights when you don’t want to leave your sleeping bag every hour.
The method gained popularity among Scandinavian cultures before spreading worldwide, proving especially valuable for winter camping and overnight burns. While enjoying your low-maintenance fire, you’ll also appreciate having fewer interruptions from mosquitoes and other insects that are naturally repelled by consistent campfire smoke.
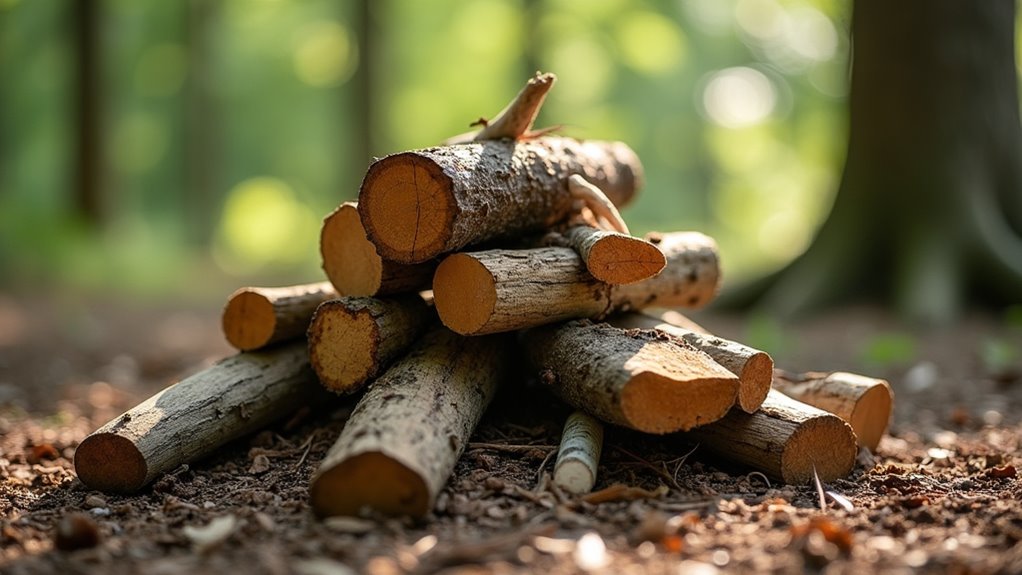
Since success hinges on choosing the right materials, you’ll want to gather three distinct wood categories before building your upside down fire.
Material selection determines your upside down fire’s success—gather tinder, kindling, and fuel wood in the right proportions before you begin building.
Start with tinder—dry bark, paper, or birch shavings that’ll catch your initial flame.
Next, collect kindling pieces about pencil to thumb thickness. These bridge the gap between your tiny flame and larger fuel.
Finally, gather fuel wood in graduated sizes: wrist-thick pieces for the foundation, then progressively smaller splits working upward.
Hardwoods like oak, maple, or hickory burn longest and create excellent coals for the base layer.
Softwoods like pine ignite faster, making them perfect for upper layers.
Ensure everything’s seasoned—green wood won’t cooperate.
Split your logs rather than using rounds; split wood exposes more surface area and burns more predictably in this method.
If you’re planning to use this fire for outdoor cooking or extended warmth during activities like fishing, consider whether renting or buying equipment makes more sense for your frequency of use.
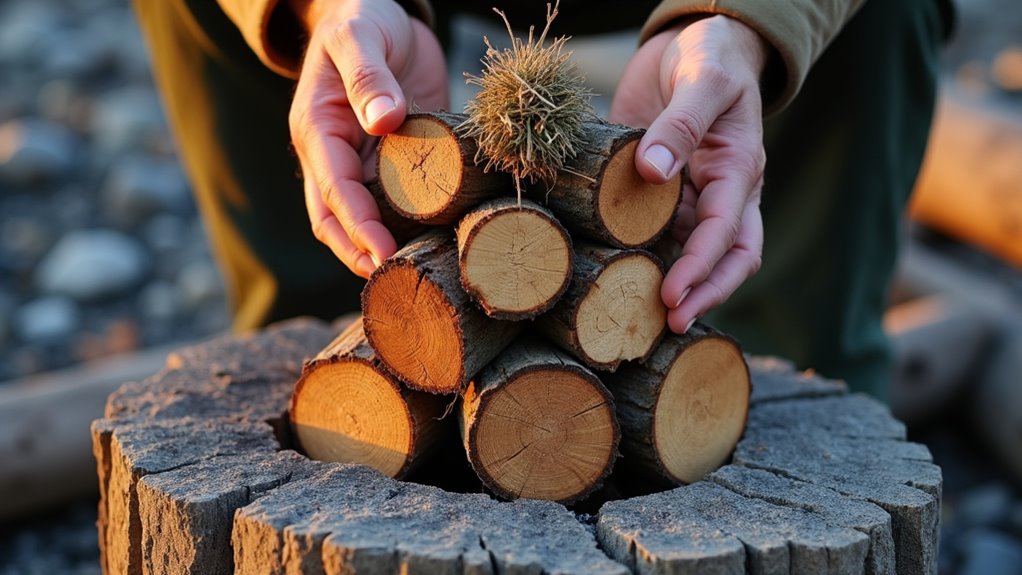
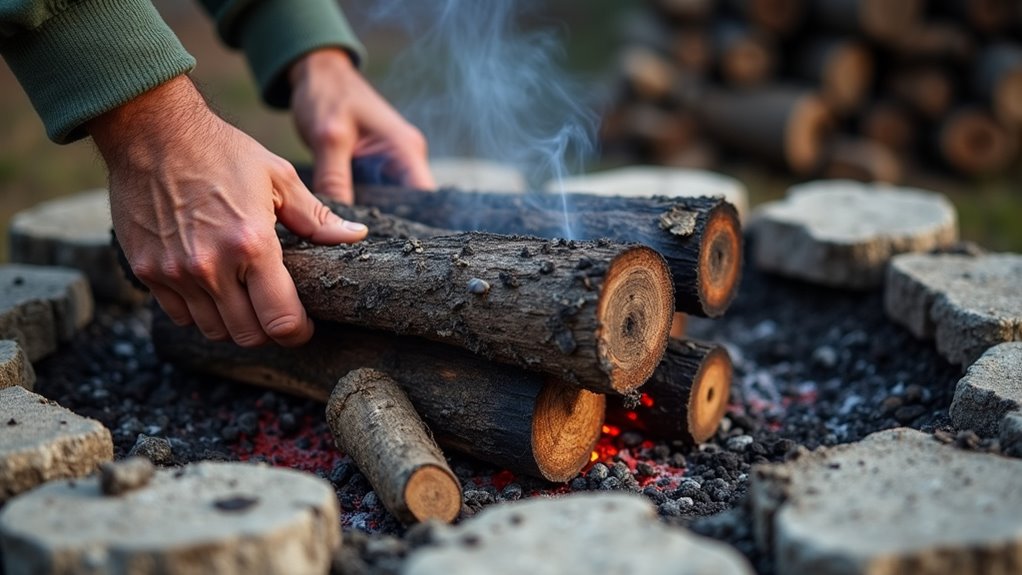
With your wood sorted and ready, creating a proper foundation determines whether your upside down fire burns consistently or collapses into frustration.
Start by clearing a flat area free of flammable debris, creating a dirt or stone circle that’s twice your fire’s intended diameter. This ancient practice prevents wildfires and contains heat effectively.
Place your largest logs parallel to each other, leaving thumb-width gaps for airflow. These foundation logs act like railroad tracks, supporting everything above while channeling oxygen upward. Don’t pack them tight—you’re not building a wall, you’re creating a breathing structure.
Add a second layer perpendicular to the first, maintaining those essential air gaps. This crisscross pattern creates stability and ensures your fire won’t shift as it burns downward through each carefully planned layer.
Remember that building a safe campfire requires following local fire regulations and checking current fire restrictions before lighting any outdoor fire.
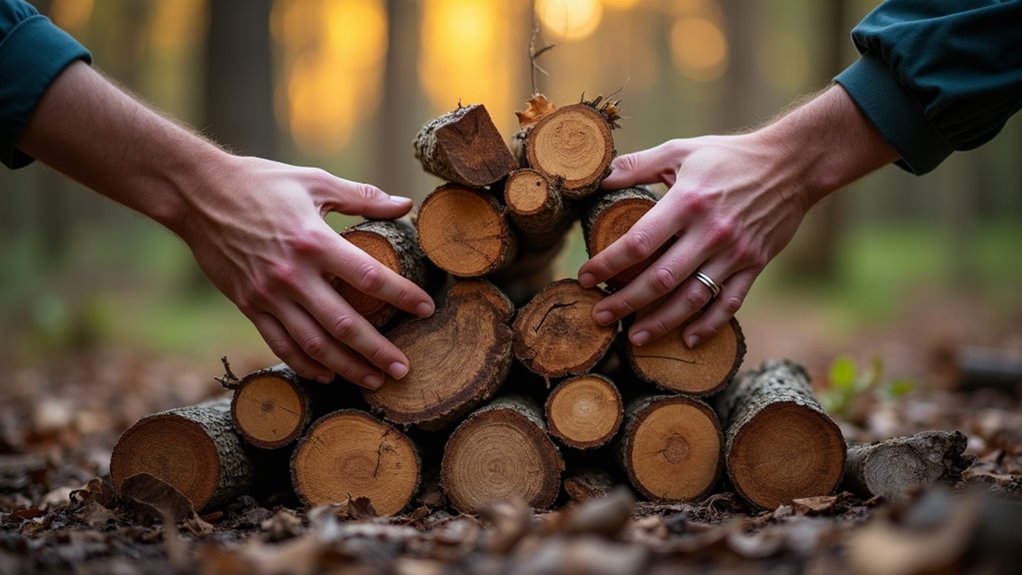
After establishing your foundation, you’ll stack the heaviest logs to form your fire’s powerhouse layer. Choose logs 4-6 inches thick and arrange them parallel to each other, leaving finger-width gaps between each piece. This spacing allows oxygen to flow through while creating a stable platform for upper layers.
Position your largest logs first, then fill gaps with medium-sized pieces. Don’t worry about perfect alignment – nature isn’t precise, and neither should your fire be. The key is creating a solid base that won’t collapse as it burns.
This bottom layer acts like a wood-burning furnace, generating intense heat that’ll ignite layers above. Think of it as your fire’s engine room – once these big logs catch, they’ll burn long and hot enough to sustain the entire structure. Having the right camping essentials nearby will help you maintain and manage your fire throughout the evening.
Once your large logs form a solid foundation, you’ll layer medium-sized wood on top to create the fire’s middle management system. These pieces bridge the gap between your hefty base logs and the delicate kindling above, ensuring steady fuel delivery as gravity works its magic.
Your medium wood should be roughly wrist-thick and positioned perpendicular to the large logs below.
This methodical stacking creates a self-sustaining burn sequence. Remember that proper wilderness camping preparation includes gathering all your wood before starting the fire to avoid leaving it unattended.
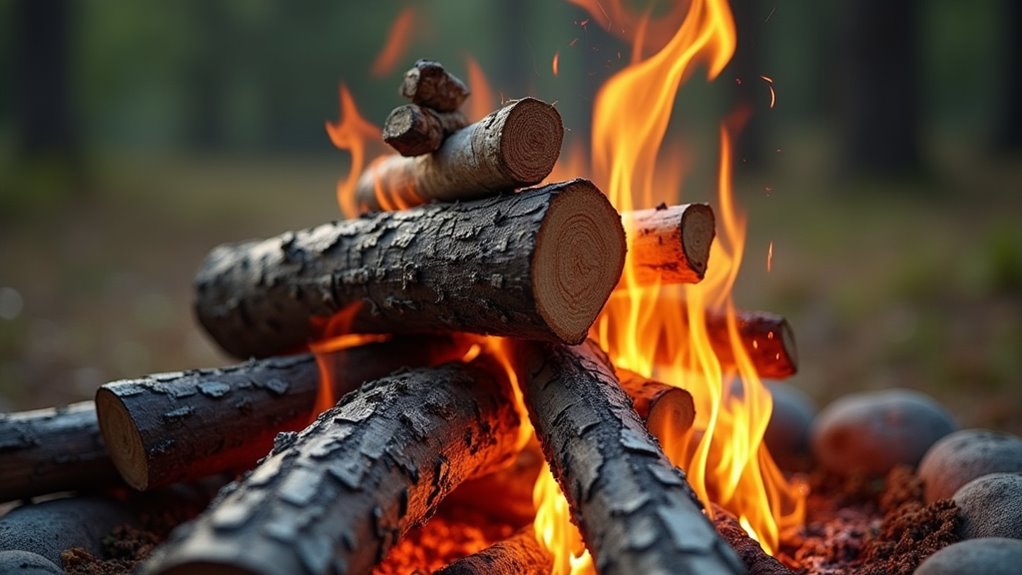
The crowning layer of your upside-down fire requires the most flammable materials you can gather—this is where the magic begins and your careful engineering pays off. You’ll want to create a nest of the finest tinder: birch bark, dry grass, paper shavings, or pine needles work perfectly. Don’t pack it too tightly—oxygen needs to flow through for ignition.
Place your fire starters strategically across this tinder layer. Commercial fire cubes, fatwood slivers, or homemade wax-soaked cotton balls all work well. Distribute them evenly so flames spread uniformly downward.
This top-down approach mimics how forest fires naturally burn, creating sustained heat that gradually ignites each lower layer. Your patience in building this reverse pyramid will reward you with hours of self-feeding flames. Once your fire is established, you can relax in your camping hammock and enjoy the steady warmth without constantly tending to the flames.
With your upside-down fire perfectly structured, you’ll need to master the lighting technique that separates successful fire-builders from frustrated campers left with smoke and ash.
The key lies in patience and strategic ignition points. Here’s your game plan:
Once your fire is established, consider setting up a camping sink nearby for easy cleanup and meal preparation without leaving your campsite.
After successfully igniting your upside-down fire, you’ll quickly discover that flames alone won’t sustain your creation—oxygen becomes your fire’s lifeline. Position your fire where natural breezes can reach it, but avoid windy spots that’ll scatter your carefully stacked fuel.
Create strategic gaps between logs during construction—these act as air channels, feeding oxygen to burning layers while allowing smoke to escape.
Strategic gaps between logs create essential air channels that feed oxygen to flames while providing escape routes for smoke.
Don’t pack materials too tightly; compressed tinder and kindling choke themselves out. Instead, leave breathing room throughout your structure.
Watch your fire’s behavior closely—weak flames signal poor airflow, while aggressive flaring means too much oxygen. Adjust by gently repositioning logs or adding wind barriers using rocks or your body.
Just like preparing for outdoor adventures such as Santa Barbara hikes, proper fire management requires understanding your environment and adapting to natural conditions.
Even when you’ve followed every step perfectly, upside-down fires can still throw curveballs that’ll test your patience. Don’t worry—most issues have straightforward fixes that’ll get you back on track.
When you’re short on regular kindling, pine cones can serve as excellent fire starters due to their natural resin content and ability to catch flame quickly.
You’ve mastered the art of building fires that feed themselves, burn longer, and require less tending. You’ll save time on constant maintenance, save energy from frequent stoking, and save frustration from fires that die out. This centuries-old technique transforms your outdoor experience—whether you’re camping under stars, hosting backyard gatherings, or simply enjoying quiet evenings by the flames. Your upside-down fire will burn steadily while you focus on what matters most.