Physical Address
304 North Cardinal St.
Dorchester Center, MA 02124
Physical Address
304 North Cardinal St.
Dorchester Center, MA 02124
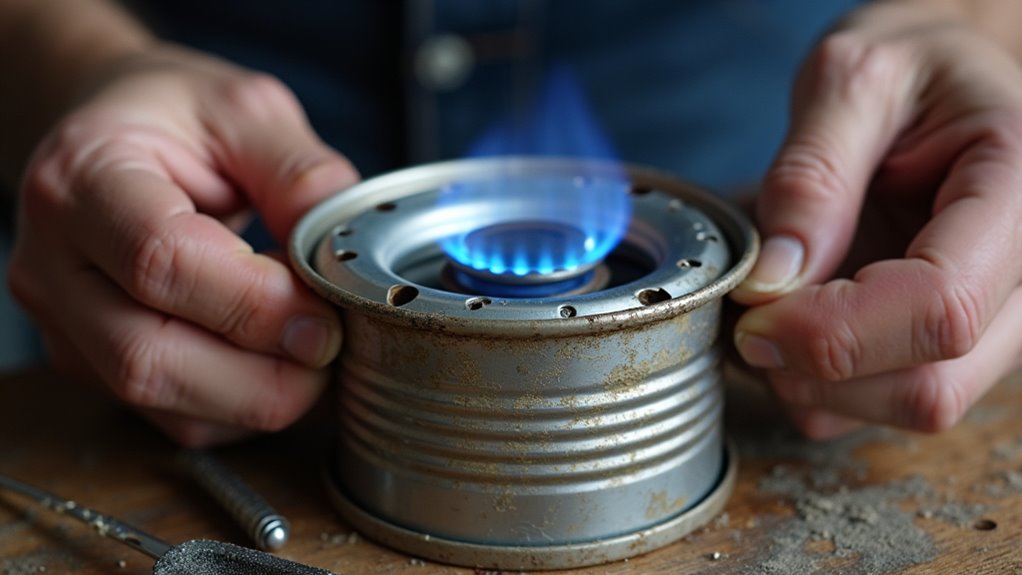
Build a lightweight camping stove from empty cat food cans for under five dollars—this simple trick will revolutionize your outdoor adventures.
Like Robinson Crusoe crafting tools from shipwreck scraps, you can transform humble cat food cans into a reliable camping stove with just a few household items. This ingenious contraption burns denatured alcohol, weighs practically nothing, and costs under five dollars to make. You’ll wonder why you’ve been lugging around that heavy camp stove when two empty cans and twenty minutes of your time can solve your outdoor cooking needs. Here’s exactly how you’ll build this lightweight powerhouse.
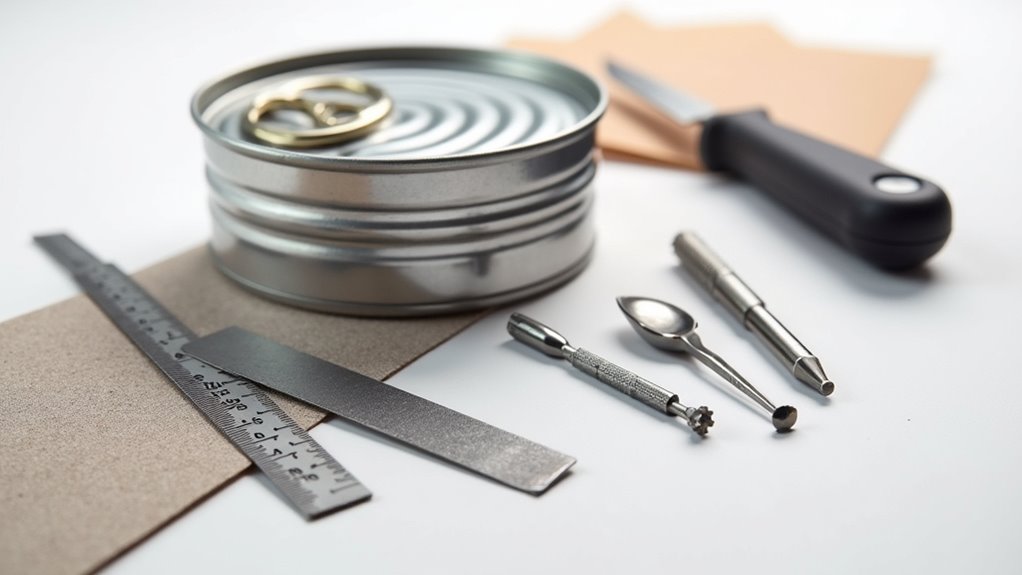
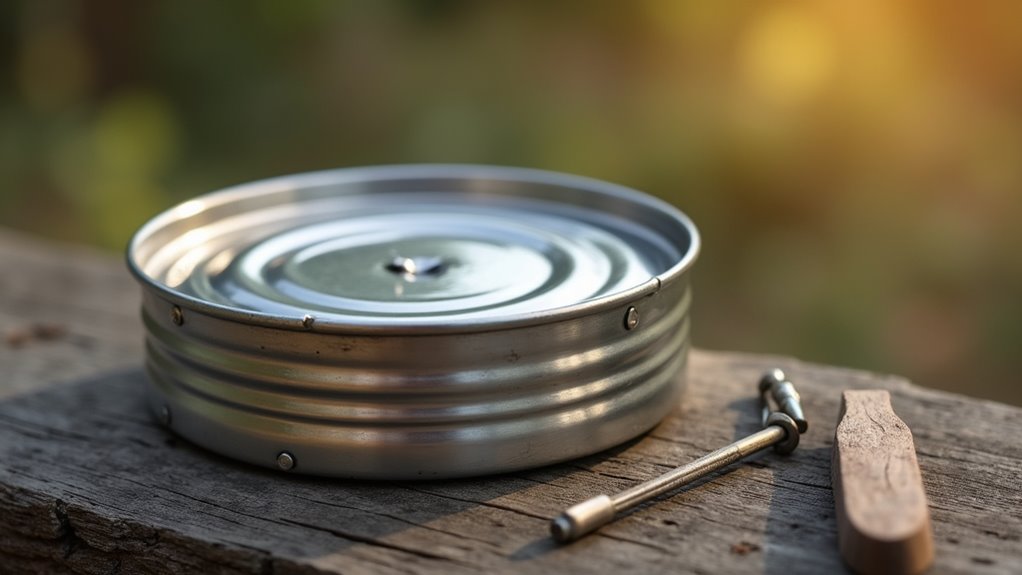
Before you plunge into building your cat can stove, you’ll want to gather a few simple materials that you probably already have lying around. You’ll need two aluminum cat food cans of identical size – make sure they’re completely empty and clean.
Grab a sharp knife or box cutter for precise cuts, plus a nail or awl for punching holes. You’ll also want sandpaper or a file to smooth rough edges, and a permanent marker for marking your cuts.
A ruler or measuring tape helps ensure accuracy. Finally, keep some rubbing alcohol handy as fuel for testing your finished stove.
These basic supplies will get you started on creating an effective, lightweight camping stove. Having proper preparation and the right materials is one of the essential tips for ensuring your camping adventure goes smoothly.
With your materials gathered, you’ll start by thoroughly washing both cat food cans with warm soapy water to remove any residual food or oils. Dry them completely before proceeding.
Next, you’ll remove the labels by peeling them off or soaking the cans in warm water to loosen the adhesive. Use a scraper or your fingernail to remove any stubborn residue.
Now examine both cans carefully for any sharp edges around the rim where the lid was removed. File down any rough spots with sandpaper or a metal file to prevent cuts during assembly. This step’s vital for safe handling.
Finally, inspect the cans for dents or damage that could affect the stove’s stability. Clean cans ensure proper fuel flow and prevent contamination that could affect your stove’s performance.
Once your cat can stove is complete, you’ll be ready to fuel up and tackle some of the world’s best hikes with your lightweight cooking setup.

Once your cans are clean and prepped, you’ll transform the bottom can into the fuel chamber that holds your alcohol. This chamber’s design directly affects your stove’s performance, so precision matters here.
You’ll need to create holes around the can’s perimeter for proper fuel flow and combustion. Here’s what you’ll do:
Your fuel chamber’s now ready for the next step. This lightweight cooking solution is perfect for tent trailers where space and weight are critical considerations.
The burner holes create the actual flame pattern for your cat can stove, and they require different positioning than your fuel chamber holes. You’ll need to punch these holes around the top rim of your can, spacing them evenly about 1/4 inch apart.
Use a small nail or pushpin to create holes that are slightly smaller than your fuel chamber holes.
Start by marking sixteen evenly-spaced points around the rim’s circumference. Push your nail straight through each mark, keeping the holes uniform in size.
Don’t make them too large, or you’ll lose pressure and get weak flames. Test the hole size by covering one with your finger – you should feel moderate resistance when blowing through it.
These holes control your flame height and fuel consumption rate. A properly functioning cat can stove makes an excellent lightweight option when you’re learning how to choose a camping tent and other essential gear for outdoor adventures.
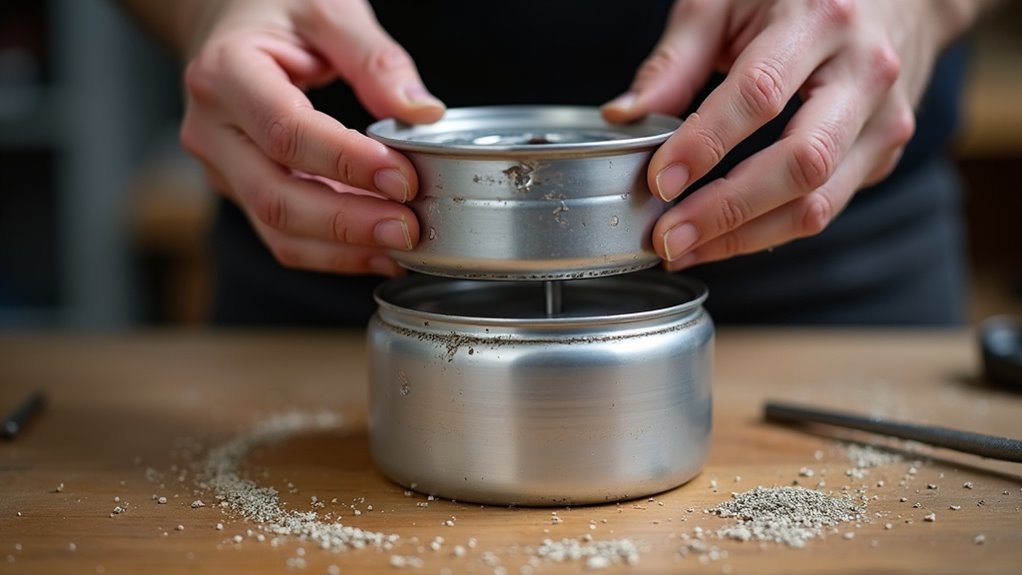
After completing both sets of holes, you’re ready to create the two-piece assembly that forms your cat can stove’s core structure.
You’ll nest one can inside the other to create the pressurized alcohol vapor system. Here’s how to assemble your stove:
Your basic cat can stove assembly is now complete and ready for testing. This lightweight design makes it perfect for fishing trips where you need portable cooking options without the bulk of traditional camping gear, especially when compared to renting boats that come with built-in cooking facilities.
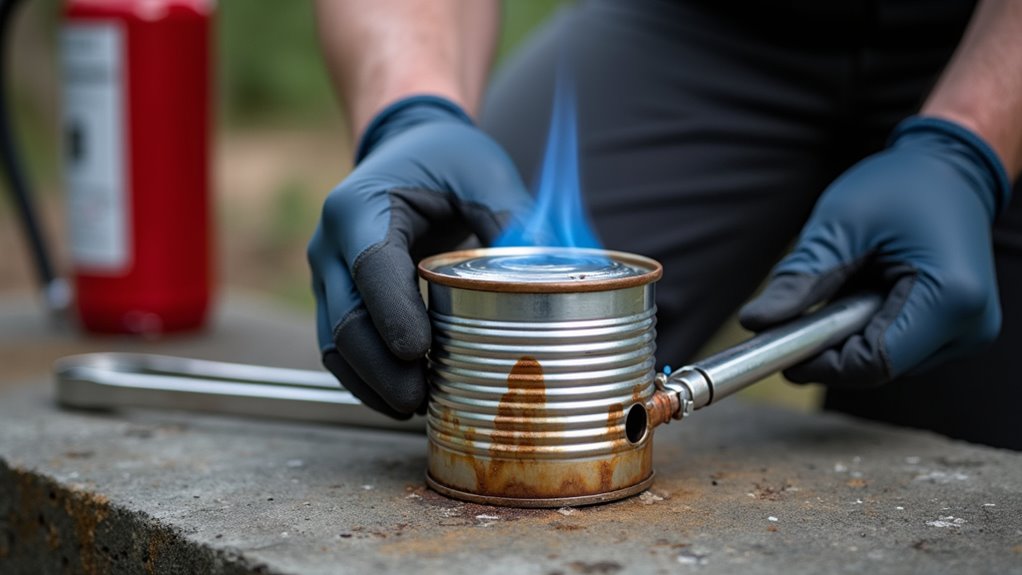
Before firing up your newly assembled stove, you’ll want to conduct a few safety checks and initial tests to guarantee everything functions properly.
First, examine all holes for rough edges that could cause injuries or fuel leaks. Check that your pot stand sits level and stable.
For your initial test, work outdoors in a well-ventilated area away from flammable materials.
Pour a small amount of denatured alcohol into the center well—start with just one ounce.
Light the fuel carefully with a long match or lighter, keeping your face away from the stove.
The alcohol should burn with a clean blue flame from the side holes.
If flames shoot too high or burn unevenly, you may need to adjust hole sizes or spacing.
Following proper camping safety protocols during testing will help ensure your homemade stove performs reliably on future outdoor adventures.
Once your cat stove is operational, you’ll need to follow essential safety protocols every time you use it. These simple precautions will prevent accidents and ensure you’re cooking safely outdoors.
Many outdoor enthusiasts who use cat stoves while glacier climbing rely on these same safety principles in extreme cold conditions where proper stove operation becomes even more critical.
While your homemade cat can stove can burn several types of alcohol, choosing the right fuel makes a significant difference in performance and safety. Denatured alcohol works best because it burns cleanly and produces minimal soot. You’ll find it at hardware stores or camping supply shops.
Isopropyl alcohol burns dirtier but works in emergencies. Avoid methanol—it’s toxic and dangerous.
Store fuel in clearly labeled, leak-proof bottles away from heat sources. Metal fuel bottles are safer than plastic for long-term storage. Never refuel a hot stove; wait until it’s completely cool.
Keep fuel containers sealed tightly to prevent evaporation and contamination. You don’t need much—two ounces typically burns for fifteen to twenty minutes, perfect for most cooking tasks.
When camping outdoors, consider bringing mosquito-repellent gear to protect yourself while cooking, as the flame and your presence can attract insects.
Although cat can stoves are remarkably simple devices, they’ll occasionally need attention to keep working properly. Regular maintenance keeps your stove burning efficiently and extends its lifespan.
Common maintenance tasks:
If your stove won’t light, check that fuel hasn’t evaporated and holes aren’t blocked.
Weak flames usually mean insufficient fuel or clogged jets.
Yellow flames indicate poor ventilation.
A well-maintained cat can stove becomes one of the most reliable camping accessories you can carry on your outdoor adventures.
You’ve just built your own Prometheus-like fire maker from humble aluminum cans. Your lightweight stove‘ll serve you well on countless adventures, transforming simple alcohol into reliable heat wherever you roam. Remember to practice safe operation, maintain those burner holes, and always carry extra fuel. Like any trusty camping companion, treat it right and it’ll never let you down. Now grab your gear and head outdoors—your homemade stove’s ready for action.