Physical Address
304 North Cardinal St.
Dorchester Center, MA 02124
Physical Address
304 North Cardinal St.
Dorchester Center, MA 02124
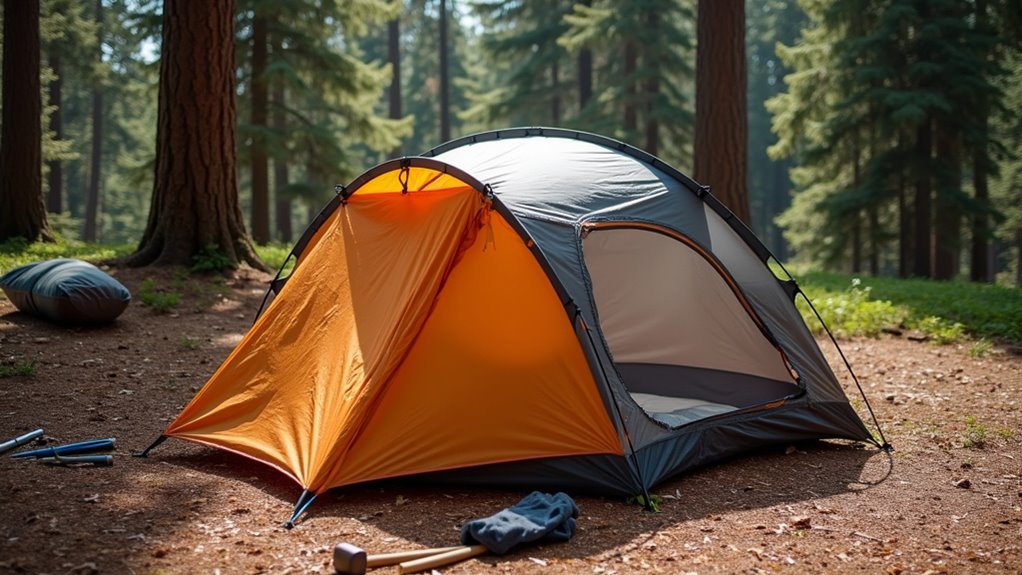
Master tent-building with 12 ingenious camping tips that transform basic materials into weatherproof shelters—but the most crucial technique will surprise you.
When your camping budget takes an unexpected detour, you’ll discover that building your own tent isn’t just about saving money—it’s about creating something that actually works better than store-bought options. You don’t need fancy gear or years of wilderness experience to construct a shelter that’ll keep you dry and comfortable through the night. The key lies in understanding which materials you can find around your campsite and how to combine them with a few simple techniques that most campers never learn.

Before you even think about hammering your first stake, you’ll need to scout out the right spot for your tent. Look for level ground that’s free from rocks, roots, and debris – your back will thank you later.
Your spine deserves better than a rocky campsite – scout for level, debris-free ground before setting up your tent.
Avoid low-lying areas where water might pool during rain, and steer clear of hilltops where you’ll catch every gust of wind.
Check for natural windbreaks like trees or large rocks, but don’t pitch directly under branches that could drop on you.
Morning sun exposure is ideal for drying out condensation quickly.
Test the ground by lying down on it first – if it’s uncomfortable now, it’ll be worse at 3 AM.
Finally, confirm you’re camping legally and following local regulations.
When selecting your spot, consider the overall camping grounds layout and amenities to ensure you’re making the most of your outdoor adventure.
Once you’ve secured your ideal campsite, you’ll want to collect both natural materials from your surroundings and essential portable gear you’ve brought along.
Look for sturdy branches that’ll serve as your tent’s frame – they should be straight and thick enough to support your shelter’s weight. Gather rocks to anchor your structure and pine needles or leaves for insulation.
From your pack, you’ll need a tarp or large plastic sheet as your primary covering. Paracord or rope is vital for securing everything together. Don’t forget a knife or multi-tool for cutting materials to size. Duct tape works wonders for quick fixes and reinforcement.
When selecting gear from your pack, consider how your body shape affects weight distribution and comfort while carrying these essential materials to your building site.
These basic materials won’t break your budget but will create a functional shelter that’ll keep you protected throughout your camping adventure.
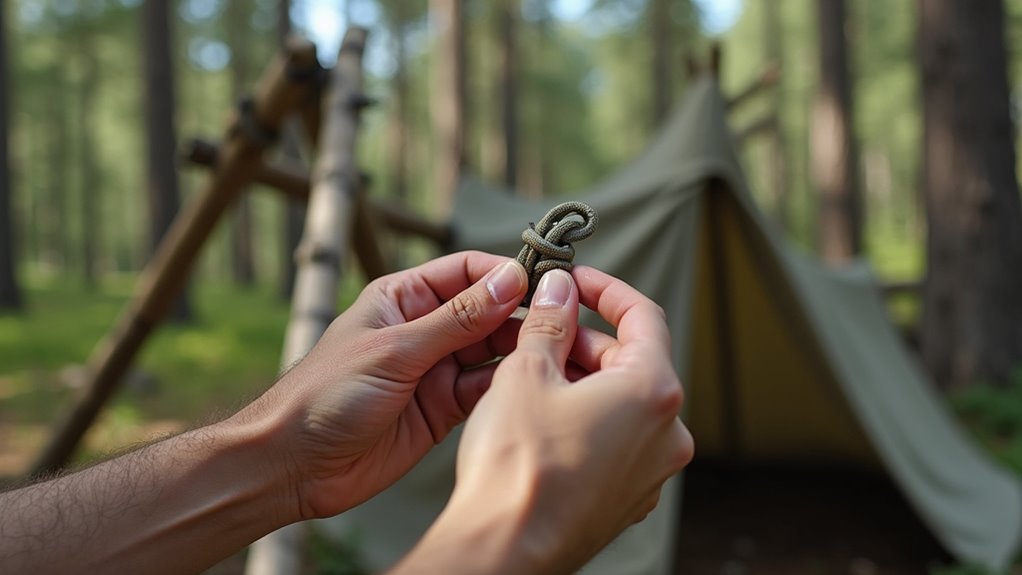
While gathering materials sets your foundation, you’ll need solid knot-tying skills to transform loose components into a sturdy shelter that won’t collapse when the wind picks up.
Master these four essential knots: the bowline creates secure loops that won’t slip, the clove hitch quickly attaches rope to poles, the trucker’s hitch provides adjustable tension for guy-lines, and the square knot joins two rope ends reliably.
These four fundamental knots form the backbone of any reliable wilderness shelter: bowline, clove hitch, trucker’s hitch, and square knot.
Practice these techniques at home using cheap paracord—it’s much easier than fumbling in darkness at your campsite.
For lashing, wrap cordage tightly around pole intersections, then secure with a clove hitch. Test every connection by giving it firm tugs.
Consider that a hammock setup might be more practical than a ground tent when camping in jungle environments where finding level ground can be challenging.
After you’ve mastered your knots, building your frame becomes the make-or-break moment for your shelter’s stability. You’ll want to focus on creating a triangular base that can handle wind and weather without breaking your budget.
Start by gathering sturdy branches or affordable PVC pipes. Your frame needs these key elements:
Test your frame’s strength before adding your tarp. Give it a firm shake – if it wobbles, reinforce those connection points.
Just like with RVs, avoiding common mistakes during your tent construction will save you from costly repairs and frustrating failures later.
A solid frame means you’ll sleep soundly.
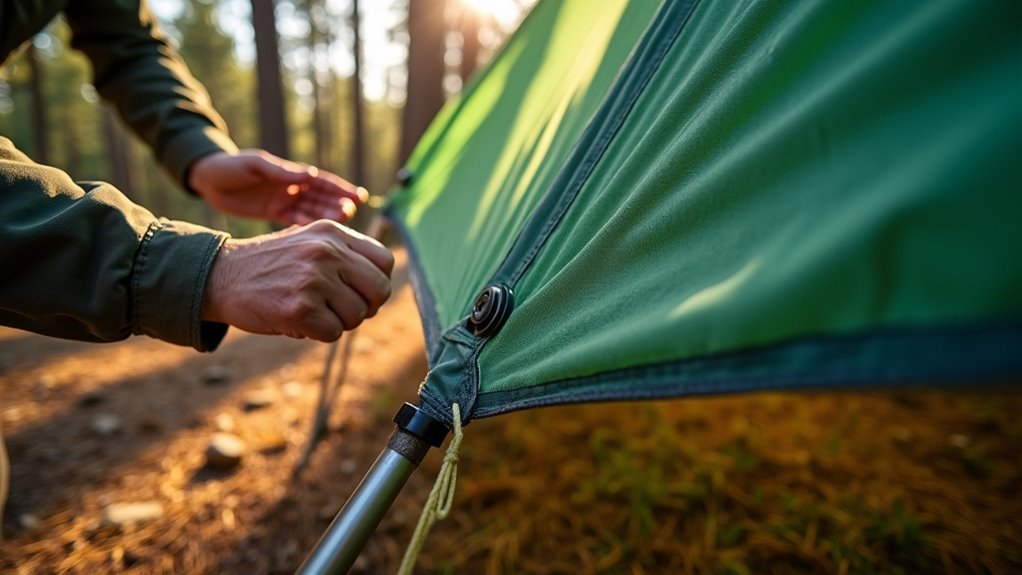
Your frame’s ready to handle whatever nature throws at it, but it’s worthless without the right covering to keep you dry and warm. Tarps offer the best bang for your buck – they’re waterproof, lightweight, and versatile. Look for ripstop nylon or polyester with at least 1,500mm water resistance rating.
A solid frame means nothing without quality waterproof covering – invest in ripstop tarps with proper water resistance ratings.
Before securing your covering, check for holes or weak spots. Patch any damage with repair tape to prevent tears from spreading. Position the tarp so water runs away from your shelter’s entrance.
Create proper tension by pulling the material taut but not overstretched – this prevents sagging and water pooling.
For extra waterproofing, apply seam sealer to stitched edges. Duck cloth works too if you’re car camping and weight isn’t critical. Consider your camping style when selecting materials, as different approaches require different shelter priorities and features.
Even the most waterproof shelter becomes dangerous without proper airflow. Condensation from your breath and body heat can soak you just as thoroughly as rain. You’ll need strategic ventilation to keep your DIY tent dry and comfortable.
Create airflow using these budget-friendly methods:
Smart ventilation costs nothing but saves you from a miserable, soggy night.
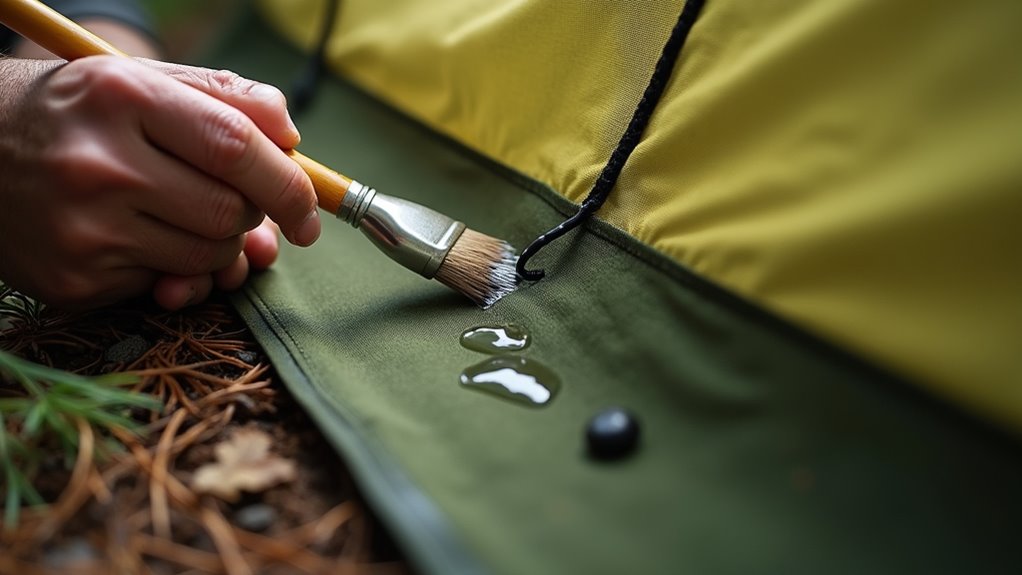
While ventilation keeps condensation at bay, you’ll still need solid waterproofing to handle actual rain and moisture from outside your shelter. Start with your fabric choice – canvas, ripstop nylon, or polyester work best.
Apply waterproofing spray or liquid sealant evenly across all surfaces, paying extra attention to seams where water typically penetrates.
For budget-friendly options, try beeswax mixed with paraffin or commercial tent waterproofing products.
Don’t forget the tent floor – use a plastic tarp underneath or waterproof the bottom fabric thoroughly.
Test your waterproofing by spraying sections with a hose before your camping trip.
Reapply waterproofing seasonally, as it wears off with use and UV exposure.
Quality waterproofing prevents soggy nights and damaged gear.
A well-waterproofed tent is essential for family adventures like river rafting trips where weather conditions can change rapidly.
Once you’ve waterproofed your tent, strong winds can still turn your cozy shelter into a flapping disaster if you don’t anchor it properly. Wind protection requires strategic planning and the right techniques to keep your homemade tent standing firm.
Position your tent’s back toward prevailing winds and use natural windbreaks like trees or rocks. Here’s how to secure your shelter effectively:
Before implementing these wind protection strategies, make sure you’ve selected the right tent size for your group to ensure optimal stability and anchoring effectiveness.
Proper anchoring means you’ll sleep soundly instead of chasing your tent across the campsite.

After securing your tent against the elements, you’ll need solid ground protection to keep moisture, cold, and critters from ruining your night’s sleep. Start with a waterproof tarp that’s slightly smaller than your tent’s footprint to prevent water pooling underneath. You can use an inexpensive plastic sheet or invest in a proper groundsheet.
For insulation, layer foam pads or reflective emergency blankets beneath your sleeping area. This barrier blocks ground cold that’ll sap your body heat all night.
Don’t forget to seal seams where your floor meets the walls using seam sealer or duct tape.
Check for sharp rocks, sticks, or holes before setup. Clear the area and fill gaps with soft materials. Your back and your gear will thank you.
Plus, consider applying waterproofing treatments to enhance your tent’s moisture resistance and extend its lifespan in wet conditions.
Since you’ve got your tent’s foundation sorted, it’s time to make the inside work for you. Smart interior features don’t require expensive gear – just creative thinking and basic materials.
Start with these essential upgrades:
You’ll maximize your tent’s functionality without breaking the bank. These modifications transform cramped quarters into organized, livable space that’ll make your camping experience substantially more comfortable. Remember to practice setting up these interior features at home before heading out, as first-time campers often benefit from familiarizing themselves with their gear in a controlled environment.

Before darkness settles in, you’ll want to thoroughly test every aspect of your newly built shelter. Check all tie-downs and guy lines for proper tension – loose connections won’t survive windy conditions.
Test every shelter component before nightfall – proper tension on tie-downs and guy lines means survival when winds pick up.
Crawl inside and move around to identify weak spots or uncomfortable areas while you can still make adjustments.
Test your ventilation by sealing yourself inside briefly; you should feel adequate airflow without drafts.
Examine the waterproofing by splashing water on seams and fabric joints. Look for leaks or pooling areas that could drip on you later.
Verify that your entrance zips smoothly and stakes hold firmly in the ground.
Practice your setup and takedown process once more. You’ll thank yourself when morning comes and you can pack efficiently without fumbling around.
Consider investing in innovative camping gear that can enhance your shelter’s performance and make future camping adventures more comfortable.
Once you’ve built your custom tent, regular maintenance will extend its lifespan and save you money in the long run. Don’t wait until something breaks – preventive care keeps your shelter reliable for years of adventures.
You’ll spend far less on maintenance supplies than replacing an entire tent.
Check zippers, guy-lines, and stakes regularly too.
A well-maintained tent becomes the foundation for countless family camping memories and adventures together.
You’ve now got the blueprint to craft your camping castle from scratch! Building your own shelter isn’t rocket science—it’s about rolling up your sleeves and making smart choices without breaking the bank. Your DIY tent will become your trusty companion under the stars, proving that sometimes the best gear is what you create with your own two hands. Sweet dreams in your handmade haven!